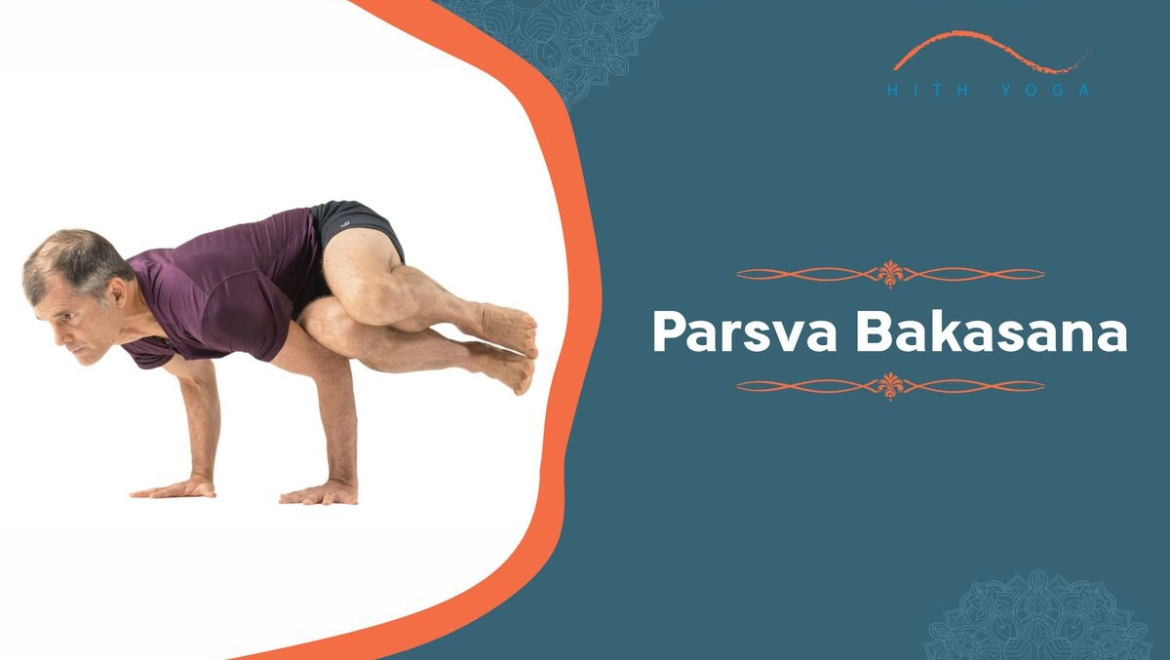
Parsva Bakasana is popularly known as Side Crane Pose, which targets the body’s arms strength and balance. Parsva Bakasana is a crane pose and a similar kakasana is the crow pose; both are balancing yoga in modern exercise. Both of these poses are confused, but the difference is that the crow pose is an arms bent pose, whereas the crane pose is an arming straighten pose (crane being the taller bird with longer legs).
The name of Parsva Bakasana comes from the Sanskrit word Baka which means crane, kaka is a crow, and asana means the pose. Do not try this if you have any lower back, wrist, or shoulder injury. It is also not recommended for pregnant women; always practice this asana within your limits and ability. This asana is much easier than the crow pose and more stable because here both the legs are together in a tight package, and arms practically creates support in balancing the body weight.
Benefits of doing Parsva Bakasana
Practicing Parsva Bakasana requires great strength and mental concentration; it must be practiced with full honesty and dedication. To reap the actual benefits, you must practice it regularly. These are the list of benefits mentioned under:
- Parsva Bakasana pose stretches the arms, wrists, builds shoulder and core strength.
- It improves your balancing power.
- It activates the naval chakra, which is traditionally believed.
- Gives you the self-confidence, power, and control.
- Parsva Bakasana strengthens the abdominal muscles and spine.
- It stretches the upper back and groin region very well.
- It helps in providing flexibility to the lower back area and spine.
- Parsva Bakasana helps in massaging your abdominal organ by twisting your torso.
- Parsva Bakasana improves your digestion system and helps in body detoxification.
Steps of doing Parsva Bakasana
Consult your doctor while practicing Parsva Bakasana, always follow the instructions of the yoga guru. Avoid the Parsva Bakasana if you have any injury as it is a balancing exercise, so it needs a lot of energy and strength. Always keep your head upside to improve your balancing power during the posture. You may continue this asana for a long duration you feel easy and comfortable. It will reap benefits if practiced regularly.
- Sit on the mat and do squatting facing the front of your mat, sit on the feet with your knees together, and settle your palms on the floor.
- Hands must be apart from each other, approx at a distance from your shoulders.
- Start to lean forward and keep your lifted. Bend your arms to a 90-degree angle by making your upper arms into a shelf, as in Chaturanga Dandasana.
- Settle your hips on your right arm shelf and your knees on your left arm shelf.
- Remain in the position until your upper arm comes parallel to the floor and lift both the feet, and balance with the help of your hands.
- Lean backward and straighten your arms to put your feet backside down.
- Then try to turn your knees to the right side of your mat and try that side too. Repeat the exercise.


Add Comment